> For the complete documentation index, see [llms.txt](https://docs.plura.io/ko/llms.txt). Markdown versions of documentation pages are available by appending `.md` to page URLs; this page is available as [Markdown](https://docs.plura.io/ko/fn/comm/newfilter/edr.md).

# 호스트보안

{% hint style="info" %}
**추천 필터 및 사용자 정의 탐지/차단 필터 제작 지원**

* 에이전트 기반의 공격 대응 방식
* 감사 정책 수행
* 로그 생성, 수집, 분석 및 공격 탐지 후 자동 차단
* 로그 업로드 시 선택 제공
* 탐지 로그 전용 / 전체 로그 포함 가능
  {% endhint %}

## 필터 등록 절차 <a href="#id-0" id="id-0"></a>

<figure><img src="/files/wjyVXNj9lSZKO9Bit9Be" alt=""><figcaption></figcaption></figure>

### 1. 메뉴 위치 <a href="#id-1" id="id-1"></a>

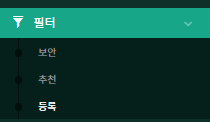
* 왼쪽 네비게이션 바에서 **필터 > 등록** 메뉴를 클릭합니다.<br>

  <figure><img src="https://qubitsec.github.io/docs/images/Manual/common/regi/system/2.png" alt=""><figcaption></figcaption></figure>

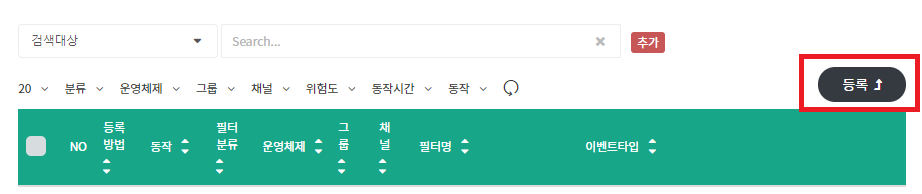
### 2. 등록 버튼 클릭 <a href="#id-2" id="id-2"></a>

<figure><img src="https://qubitsec.github.io/docs/images/Manual/common/regi/system/3.png" alt=""><figcaption></figcaption></figure>

### 3. 필터 분류 선택 <a href="#id-3" id="id-3"></a>

<figure><img src="/files/T2lQMmQHSdrUrTZVygZM" alt=""><figcaption></figcaption></figure>

### 4. 그룹 선택 <a href="#id-4" id="id-4"></a>

### 5. 운영체제 선택 <a href="#id-5" id="id-5"></a>

### 6. 채널 선택 <a href="#id-6" id="id-6"></a>

<figure><img src="https://qubitsec.github.io/docs/images/Manual/common/regi/system/5.png" alt=""><figcaption></figcaption></figure>

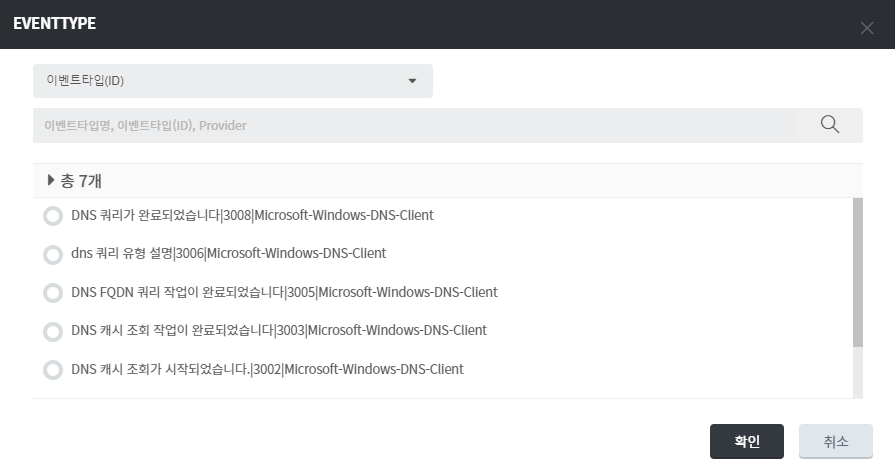
### 7. 이벤트 타입 선택 <a href="#id-7" id="id-7"></a>

<figure><img src="https://qubitsec.github.io/docs/images/Manual/common/regi/system/6.png" alt=""><figcaption></figcaption></figure>

### 8. 필터명 입력 <a href="#id-8" id="id-8"></a>

* 등록할 필터의 이름을 입력합니다.

### 9. 필터 설명 입력 <a href="#id-9" id="id-9"></a>

* 필터의 목적이나 사용 방법에 대한 설명을 입력합니다.

### 10. 필터 위험도 설정 (Very High/High/Middle/Low) <a href="#id-10" id="id-10"></a>

* 필터의 위험도를 설정합니다.

### 11. 필터 동작 시간 설정 (24시간/시간 설정) <a href="#id-11" id="id-11"></a>

<figure><img src="https://qubitsec.github.io/docs/images/Manual/common/regi/system/7.png" alt=""><figcaption></figcaption></figure>

* 예를 들어, 퇴근 시간 이후부터 출근 시간까지 필터가 동작하도록 설정하려면 "시간 설정"을 선택하고 원하는 시간을 입력합니다.

### 12. 동작 설정 <a href="#id-12" id="id-12"></a>

* 화면 하단의 정보 입력 영역에서 **추가** 버튼을 클릭하여, 필터가 포함할 데이터 값 또는 제외할 값을 입력합니다.
* 필터 등록 시 과탐 또는 오탐이 발생할 수 있으니, 등록 전에 담당자와 확인하는 것이 좋습니다.
* 네트워크 필터를 등록할 경우, 필터 분류는 \*\*etc.\*\*로 설정해야 합니다.

<figure><img src="/files/XSmeondxLXLc6AoXrpGB" alt=""><figcaption></figcaption></figure>

### 13. 동영상 <a href="#id-13" id="id-13"></a>

{% embed url="<https://youtu.be/y9NnH2fjzEU>" %}
<https://youtu.be/y9NnH2fjzEU>
{% endembed %}